
Choosing the right Metal Hole Saw can determine whether a drilling job ends cleanly or becomes a frustrating repair. A sharp, well-matched saw can cut through steel with steady pressure, while the wrong tool may overheat, chatter, or leave a jagged opening. Material thickness, hole diameter, and cutting speed all influence the result. Small details matter.
Experienced tradespeople usually inspect more than the advertised size. Bi-metal teeth suit many workshop tasks, while carbide-grit designs often handle tougher materials and abrasive surfaces. The arbor must match the drill and remain stable under load. A pilot drill also deserves attention, because excessive movement can damage the workpiece before the teeth engage. Manufacturer guidance remains essential, especially for stainless steel or thick plate.
Real working conditions can expose weaknesses that product descriptions overlook. A saw that performs well on a bench may struggle overhead or inside a cramped cabinet. Heat marks around the hole often signal excessive pressure, poor lubrication, or an unsuitable speed. Yet no selection guide is perfect; user technique, drill quality, and maintenance can change the outcome. These seven practical tips examine the choices that matter, from tooth design and diameter to cutting depth, compatibility, and service life. The goal is not simply to buy a larger or more expensive tool. It is to choose a Metal Hole Saw that matches the material, equipment, and actual demands of the job.
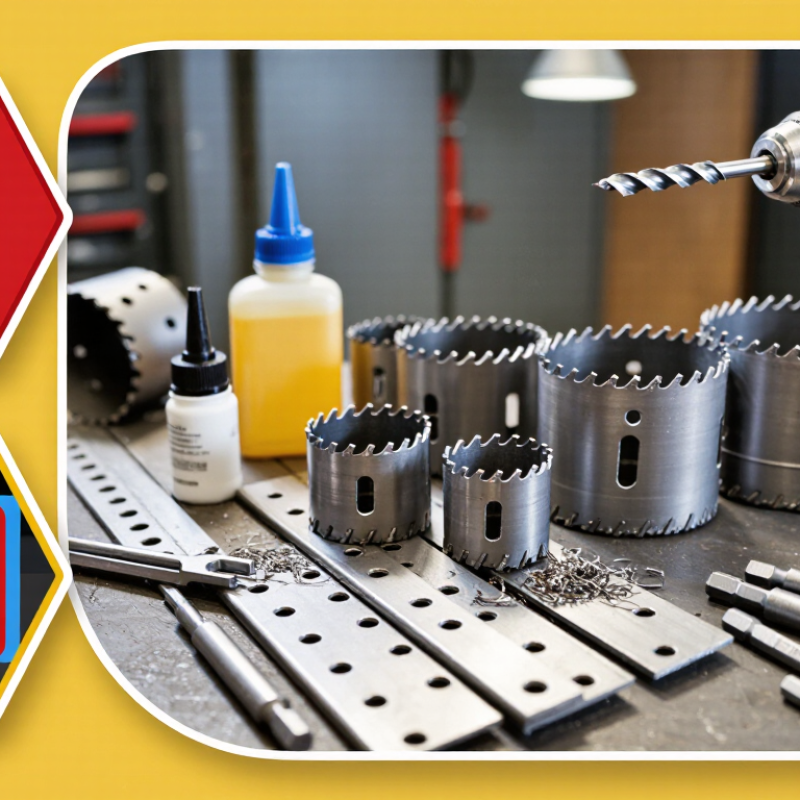
Classifying the workpiece is one of the most important decisions when selecting a metal hole saw. M35 high-speed steel contains about 5% cobalt, offering a practical balance of hardness, toughness, and cost. It suits mild steel, structural tubing, aluminum, and many general workshop applications. Keep the saw cutting steadily, not aggressively.
M42 contains about 8% cobalt. That extra cobalt improves hot hardness, helping the teeth resist softening when cutting stainless steel, tool steel, or other heat-resistant alloys. It is useful when friction builds quickly, especially in thick plate or repeated production work. However, a harder grade is not automatically better. A poorly selected tooth pitch or excessive cutting speed can damage either material.
I have seen good saws fail because the operator rushed the cut. Use firm pressure, suitable cutting fluid, and a speed matched to the workpiece diameter. Thin sheet may need finer teeth to prevent snagging, while thicker material often benefits from a variable pitch.
Check the chips: sharp, small curls usually indicate healthy cutting; blue chips suggest too much heat. M42 can tolerate more heat, but it cannot correct careless setup. I still reassess the choice when the workpiece contains welds, scale, or interrupted surfaces. Those details are easy to overlook.
Choosing a metal hole saw starts with tooth pitch, not appearance. Tooth pitch means the number of teeth per inch, or TPI. For general metal cutting, 4/6 TPI is a practical starting point. Its alternating tooth spacing reduces vibration and clears chips more effectively than a single coarse pitch. It suits mild steel, aluminum, and many thin-wall metal sections.
Thickness still controls the result. Aim to keep at least two teeth engaged during the cut. If the material is very thin, a coarse tooth can grab, bend the sheet, or leave a rough opening. A finer pitch may work better there. For thicker steel, 4/6 TPI usually provides a steady balance between cutting speed and tooth strength. Test on scrap first.
Small details matter. Mark the center clearly, secure the workpiece, and use a pilot drill without forcing it. Apply suitable cutting fluid, then run the drill at a moderate speed. Let the teeth cut; heavy pressure creates heat and dulls them quickly. I have seen operators push harder when the saw slows, although reducing speed and clearing chips often works better. That mistake is easy to repeat. Inspect the teeth after each hole, especially when cutting painted or coated surfaces. A damaged tooth can make the next cut wander.
Choosing the right metal hole saw starts with speed, not appearance. Calculate cutting speed with RPM = (SFM × 3.82) ÷ saw diameter. SFM means surface feet per minute. A 1-inch saw running at 80 SFM needs about 306 RPM. A 2-inch saw at 40 SFM needs about 76 RPM. The larger diameter needs slower rotation.
Machinery’s Handbook, 31st Edition, provides machinability tables that show lower cutting speeds for harder metals and higher speeds for softer alloys. Use those ranges as a starting point, not a guarantee. For mild steel, begin conservatively around 60–100 SFM. Stainless steel often requires less speed and steady feed to limit heat. Measure the saw diameter carefully. Small errors change the result.
For example, a 1.5-inch saw at 50 SFM calculates to roughly 127 RPM. Set the machine near that value, then watch the chips. Blue chips, smoke, or squealing usually indicate excessive heat. Slow down. Apply suitable cutting fluid and clear chips frequently. OSHA’s Hand and Power Tools guidance emphasizes guarding, secure workholding, and controlled tool use, but it does not replace material-specific speed data. My own mistake has been trusting a clean formula while ignoring a dull pilot drill. The calculation was correct. The cut was still poor. Check tooth condition, material thickness, and machine stability before adjusting RPM.
Recommended starting spindle speeds vary by material and hole-saw diameter. RPM is calculated using: RPM = (SFM × 3.82) ÷ Saw Diameter.
The chart uses representative starting cutting speeds of 80 SFM for mild steel, 50 SFM for stainless steel, 250 SFM for aluminum, and 60 SFM for cast iron. Reduce speed if the material overheats, vibrates, or produces excessive tooth wear.
7 Tips for Choosing the Right Metal Hole Saw
Select the Arbor and Pilot Drill for Hole Diameter and Material Thickness
Choosing a metal hole saw starts with two measurements: the required hole diameter and the material thickness. Measure the finished opening, not the marked outline. A hole saw should match the diameter closely, because enlarging an oversized hole is difficult. For large diameters, choose a rigid arbor with a shank that fits the drill chuck securely. A weak arbor can wobble, damage the teeth, or leave an uneven opening.
The pilot drill also needs careful selection. Its length should pass through the metal without extending excessively. Too much projection can make the drill wander before the saw teeth engage. For thin sheet metal, use light pressure and a sharp pilot point. Thick steel requires a stronger pilot drill and a stable arbor assembly. Leave enough cutting depth for the hole saw, but check its rated capacity before starting. Some materials may need a hole from both sides.
Material changes the setup. Mild steel cuts differently from stainless steel or aluminum. Use a slower speed for harder metals and apply suitable cutting fluid to control heat. Stop occasionally and clear packed chips. I have seen operators focus only on diameter and overlook thickness. That mistake is easy to repeat. Check arbor fit, pilot length, and material hardness together before cutting. A short test hole in scrap metal can reveal vibration, excessive heat, or poor alignment.
7 Tips for Choosing the Right Metal Hole Saw
Hardened and abrasive metals punish weak teeth and poor cooling. Choose a carbide-tooth hole saw with a rigid body, suitable for hardened steel, cast iron, or stainless steel. Tip geometry matters. A fine, variable pitch can reduce vibration, while open gullets improve chip clearance. Keep the pilot drill short and secure. Excessive pilot length increases wandering and tooth impact. That mistake is easy to make.
Control heat with a compatible cutting fluid, steady feed pressure, and the manufacturer’s recommended speed. Do not force a dull saw. It creates heat faster than it removes material. OSHA’s Table Z-1 lists a 5 mg/m³ permissible exposure limit for mineral-oil mist, so ventilation and fluid management remain practical safety concerns. NIOSH guidance also emphasizes enclosed processes and local exhaust where mist may form.
Check seven details before cutting: carbide grade, tooth pitch, gullet depth, coolant delivery, pilot stability, machine rigidity, and replacement access. Abrasive cast iron needs generous chip space and frequent chip removal. Hardened steel needs controlled speed and firm pressure. ASM International machining guidance identifies heat, work hardening, and abrasive inclusions as key tool-life factors. In practice, I would test one hole first. Published settings can still fail when the plate is uneven, the coolant is contaminated, or the operator pauses mid-cut.
| Tip | Selection Dimension | Typical Metal Condition | Practical Recommendation | Why It Matters |
|---|---|---|---|---|
| 1 | Match the tooth material to hardness | Mild steel, stainless steel, tool steel, cast iron, and non-ferrous metals | Use high-speed steel teeth for general mild-steel and aluminum work. Choose carbide-tipped teeth for hardened steel, stainless steel, cast iron, fiberglass, and other abrasive materials. | Carbide retains hardness at higher cutting temperatures and resists abrasive wear better than conventional high-speed steel. |
| 2 | Select an appropriate tooth pitch | Thin sheet, tubing, structural sections, and thick plate | Use a finer pitch for thin sheet and tubing to maintain several teeth in contact. Use a coarser or variable pitch for thicker material to improve gulley capacity and reduce clogging. | The correct pitch helps prevent tooth snagging in thin stock and provides enough chip space in thick stock. |
| 3 | Provide continuous coolant or cutting fluid | Stainless steel, hardened steel, nickel alloys, and other heat-sensitive metals | Apply a suitable metalworking cutting fluid at the cutting zone. For vertical or overhead work, use a paste or gel that stays on the teeth. Avoid dry cutting unless the tool and material instructions specifically permit it. | Cooling and lubrication lower friction, reduce work hardening, extend tooth life, and improve the quality of the hole. |
| 4 | Allow chips to clear from the kerf | Deep cuts, abrasive metals, and holes larger than approximately 25 mm (1 in) | Choose a saw with deep gullets or a variable-pitch design. Periodically withdraw the saw to remove chips, especially when cutting thick material or when chips begin packing around the arbor. | Packed chips increase friction and heat, restrict coolant access, and can damage or strip the teeth. |
| 5 | Control speed and feed pressure | All metals, especially stainless steel and hardened alloys | Use the manufacturer’s recommended speed range as the starting point. Reduce speed for larger diameters and harder metals. Apply steady pressure that produces chips without forcing the saw or causing tooth chatter. | Excessive speed generates heat, while insufficient feed can rub instead of cut and may promote work hardening in stainless steel. |
| 6 | Check arbor, pilot drill, and tool stability | Hand drills, drill presses, angled cuts, and large-diameter holes | Use a rigid arbor with the correct thread and pilot drill. Secure the workpiece firmly, keep the drill aligned, and use a drill press when accuracy and stability are important. | A stable setup reduces vibration, uneven tooth loading, oversized holes, and premature breakage of the pilot or cutting teeth. |
| 7 | Verify the tool’s cutting range and condition | Hardened or abrasive metals, coated materials, and repeated production work | Confirm the maximum cutting depth, diameter range, and material compatibility before use. Replace a saw when teeth are chipped, rounded, missing, or producing excessive heat despite correct speed and coolant. | A worn or unsuitable saw requires more force, increases heat generation, and can produce inaccurate holes or unsafe tool failure. |
